 I’m very happy with my Dell Precision M4500 equipped with Intel Core i7-740QM, 8GB RAM, nVidia Quadro FX 1800M and Seagate 500GB FIPS self-encrypting disk.
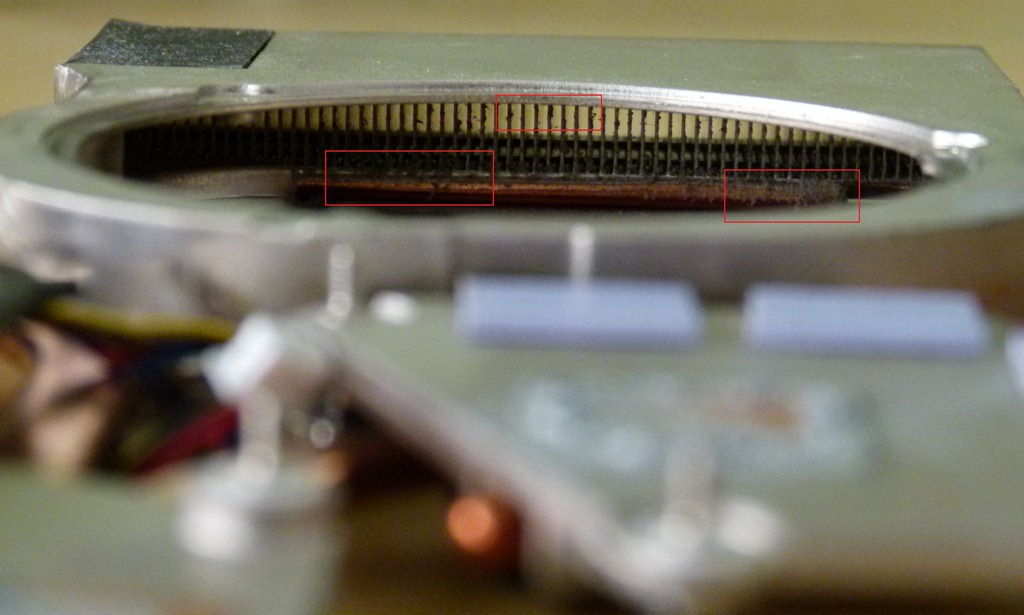
But there’s one major setback; it overheats extremely quickly (as mentioned by TechRadar). This is especially true after a certain period of using the system. The fans suck in fresh air and (after cooling the processor, gpu and chipset) blows it again. In the meantime it collects dust on the fan and the vent.
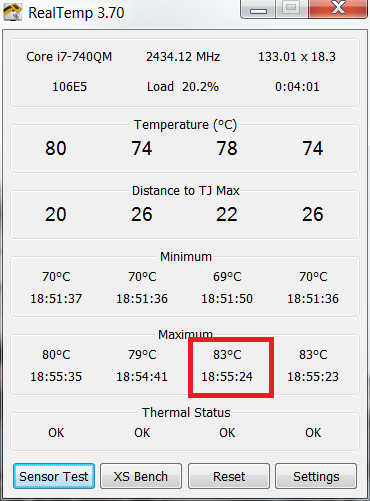
After removing the dust my CPU temperature decreased from 83C/181F to 51C/124F.
High CPU temperature
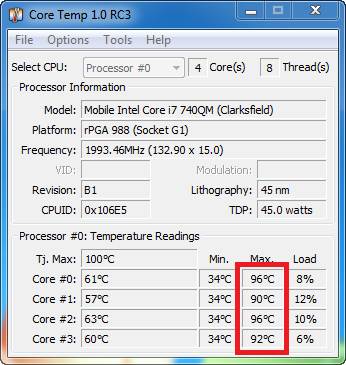
I’ve been using the laptop since February 2011 and I noticed the CPU temperature was getting pretty high (and the system was slowing down). Yesterday I worked the whole day with the Remote Desktop Client (a low impact process) and recorded a peak temperature of 83C/181F. My collegaue Remko Weijnen even measured a whoppin’ 96C/205F!
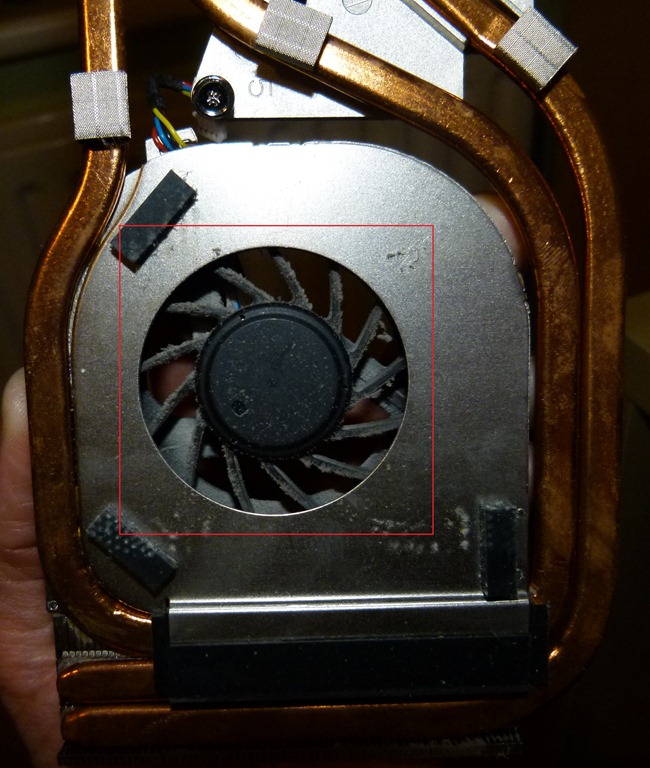
The dust collector
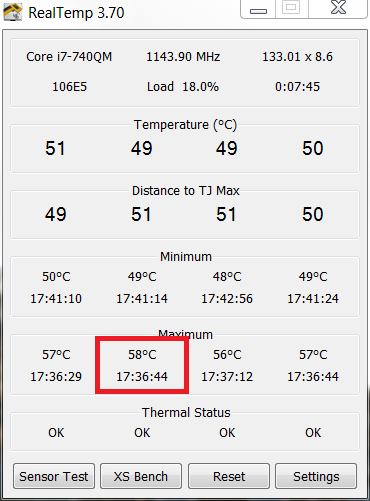
Because dust is collected in the fan and the vent, the cooling capabilities decreases resulting in a higher temperature. So the most logical thing to do is to clean the dust. I’ve opened the laptop, removed the fan and blew the dust out. Today I’ve worked with the Remote Desktop Client again and recorded a more acceptable peak temperature of 58C/136F and a nominal temperature of 51C/124F.
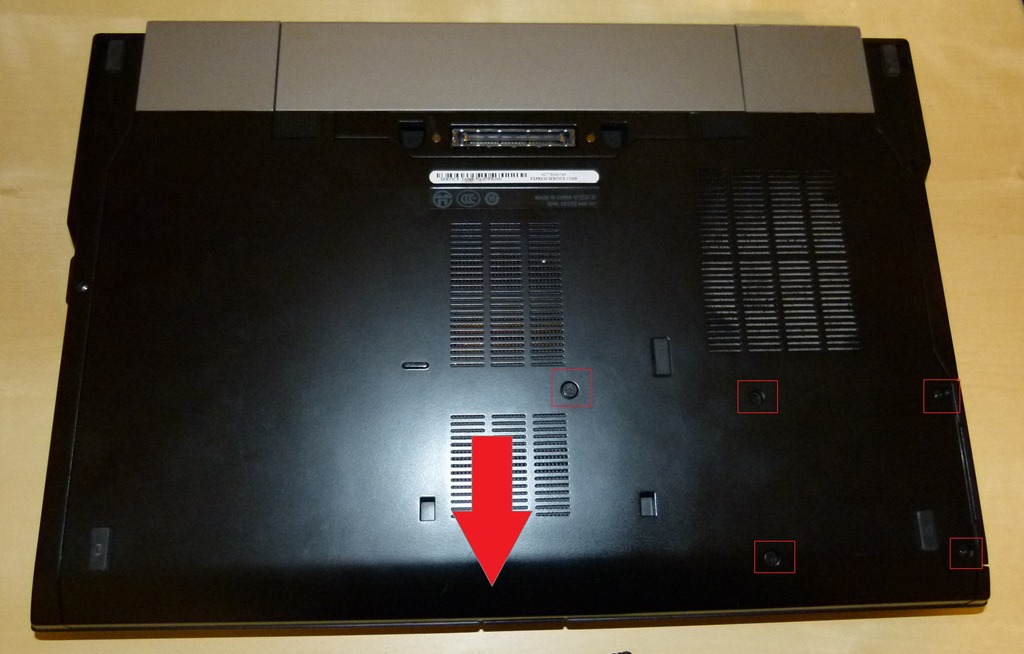
Cleaning the dust
Step 1 : Remove the central screw (1), screws that hold the HDD (4) and slide the back to the front.
Step 2: Remove the screws (7) that holds the fan and thermal block in place (the screws are marked with a number, remove them in the provided order) and slide the whole unit to the right and up.
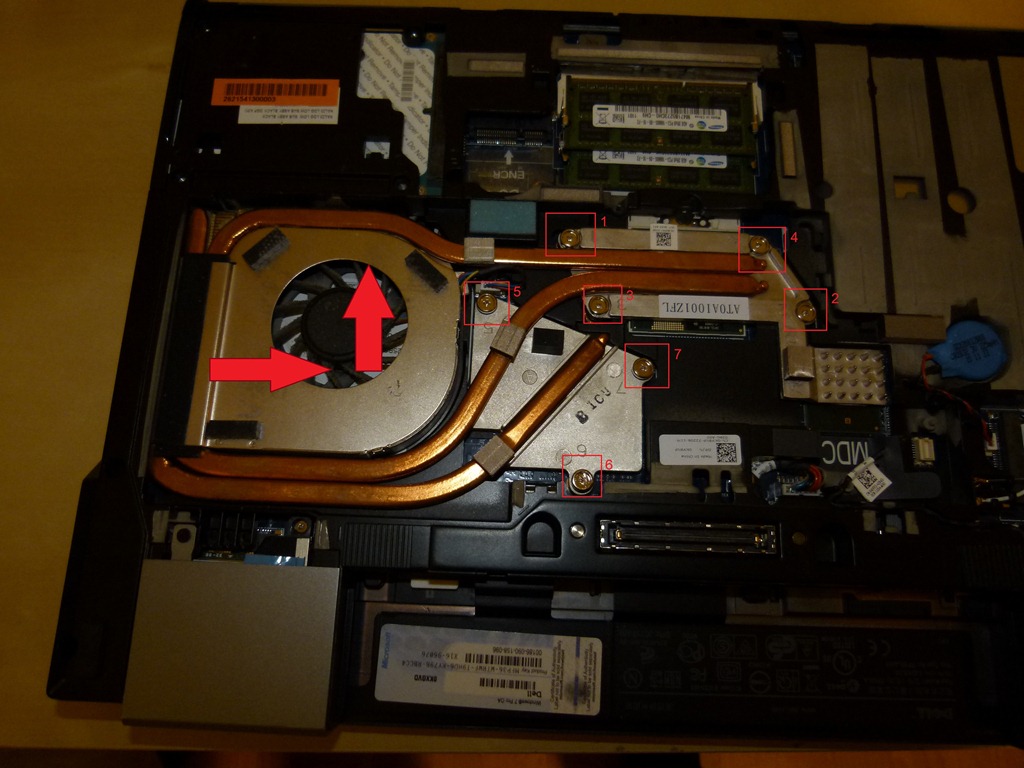
Step 3: Remove the fan from the fan-holder by removing the screws (3)
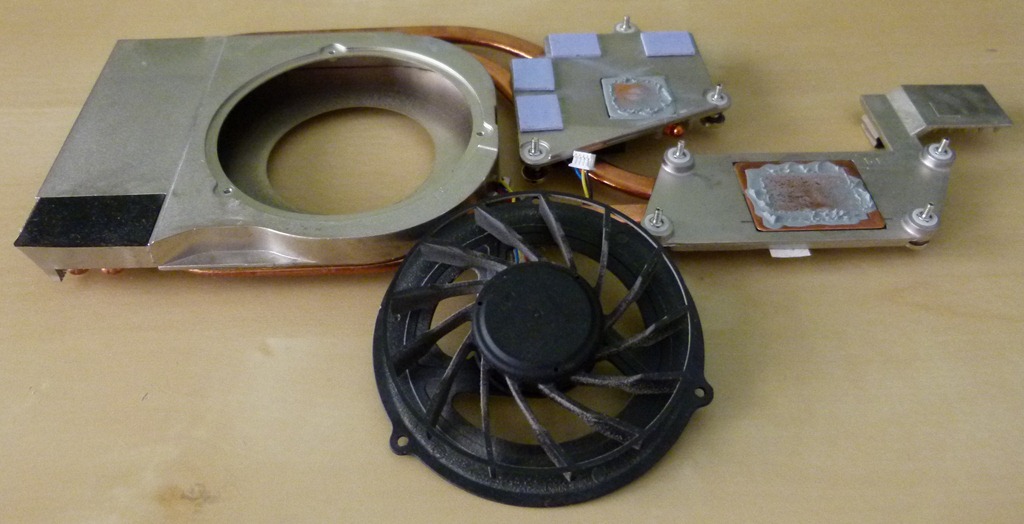
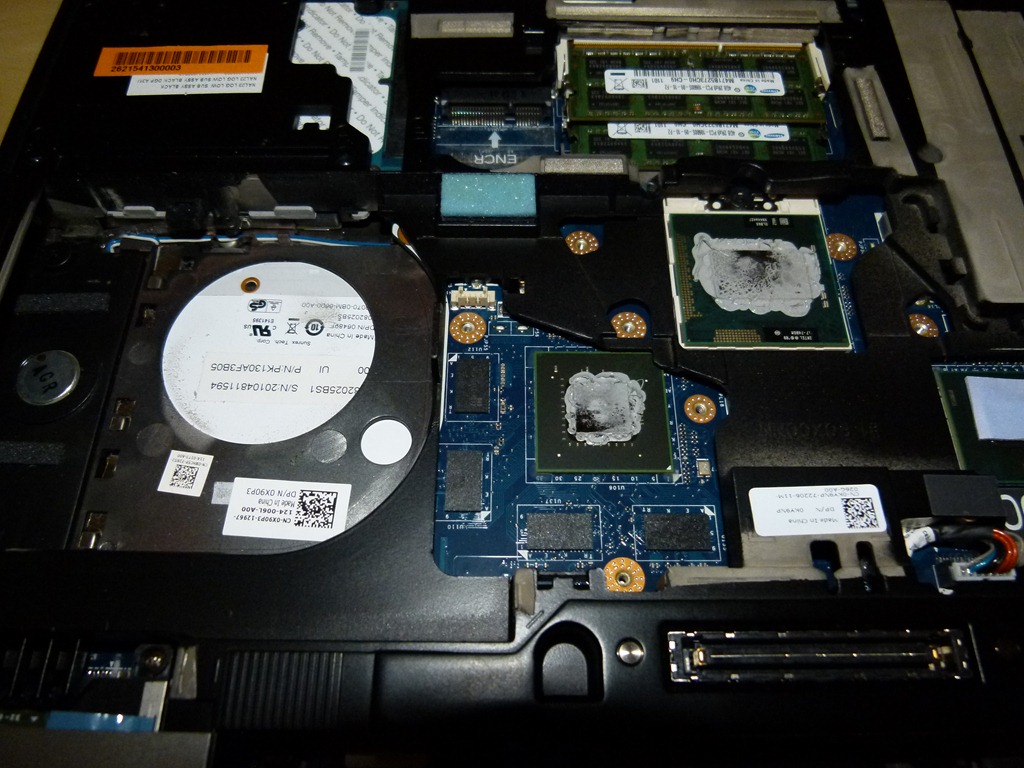
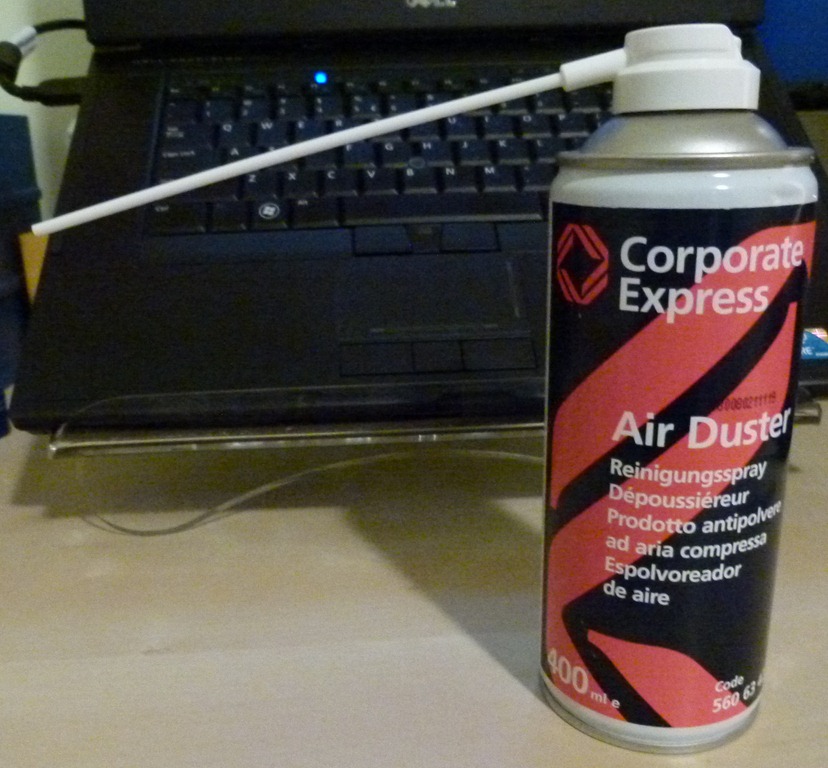
Step 4: Remove the dust from the fan, vent and back using a air-duster, compressor or vacuum cleaner.
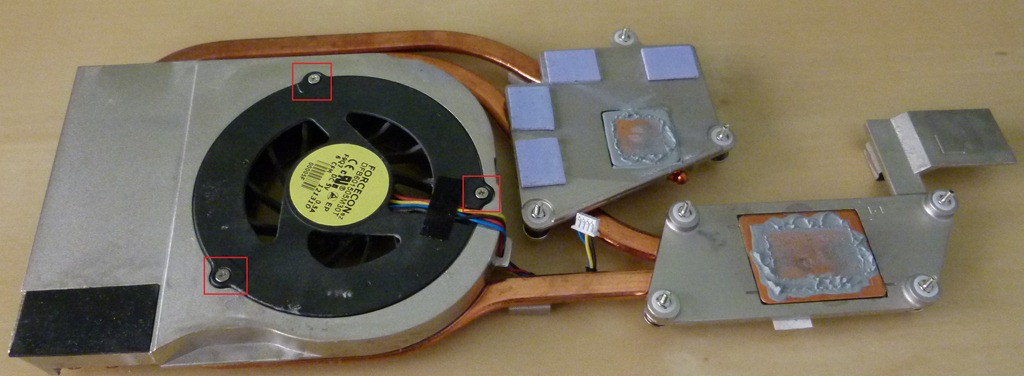
Step 5: Insert the fan in the fan-holder, re-apply cooling paste on the processor and GPU and re-assemble the laptop (step 1 and 2 in the reverse order).
On my M4500 dust had accumulated between the fan and the pipes where the air blows out on the side. I had to remove the heatsink and then remove the fan to get the dust out.
Hi Remko. Good one! I’ve added a step for removing the fan and pictures of the dust accumulated on the inside (http://www.ingmarverheij.com/wp-content/uploads/2012/03/P1020057_thumb.jpg).
Just wanted to say thanks very much for this article. I have been having terrible overheating problems with my Dell m4500 lately and tonight I got the blue screen of death. My laptop almost burned me it was so hot! I followed your instructions and they were perfect (except you might want to add that before one can remove the fan completely from the laptop, the fan must be unplugged from the board… Maybe between step 2 and step 3).
When I got the fan out used compressed air, it was like a dust bin! In fact, I didn’t even know that the intake vent was supposed to be see-through! There was so much caked dust everywhere that I was literally coughing. Once I got it all cleaned up and put back together, my laptop booted in lightening speed and it’s now quietly humming (whereas before it would sound like a cyclone).
Thanks again!
Jax
Thank you very much. My IT-supplied M4500 was becoming uncomfortable to operate as it was getting very hot, and your tutorial was very handy.
I did not remove the headpipes: I was concerned about damaging the thermal grease connection (and I have found applying thermal grease is more art than science).
I found that just blowing the dust out by openning the back and using canned air blowing in the exhaust vent. This did a very adequate job without having to deal with thermal grease.
Dropped 10C per RealTemp.
Have replaced fan and heatsink with new one and it is running a lot cooler, old fan wasn’t coming on all the time. Computer is working, but shuts off after 20 minutes or so. When rebooting it reports overheating even though the computer is cool. Any suggestions
Did you use cooling paste when you replaced the unit?
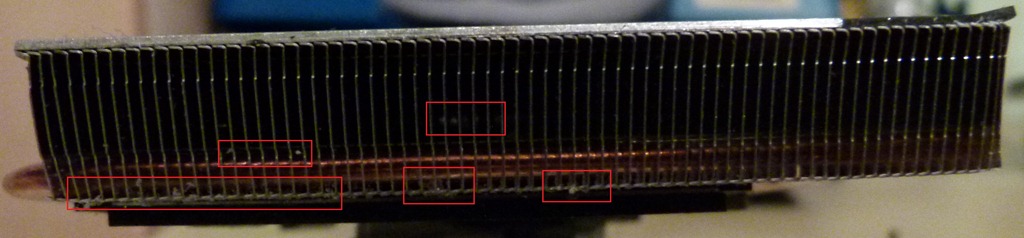
Great tip. My M4500 started overheating. Usual temperature was 75, shooting up to 90 after any intensive video use. Now it runs all the time at 58. You think you had dust? See the picture of my laptop 🙂 [IMG]http://i58.tinypic.com/2ufvp8j.jpg[/IMG] This is a closeup of the same piece you show on the second picture of your step 4. I could not take a better quality picture, but you can see the amount of dust.
Thanks for the write-up. I recently acquired an M4500 for daily use, and was dismayed that it did not have individual bottom-side panels for components like I am used to seeing on Dell machines.
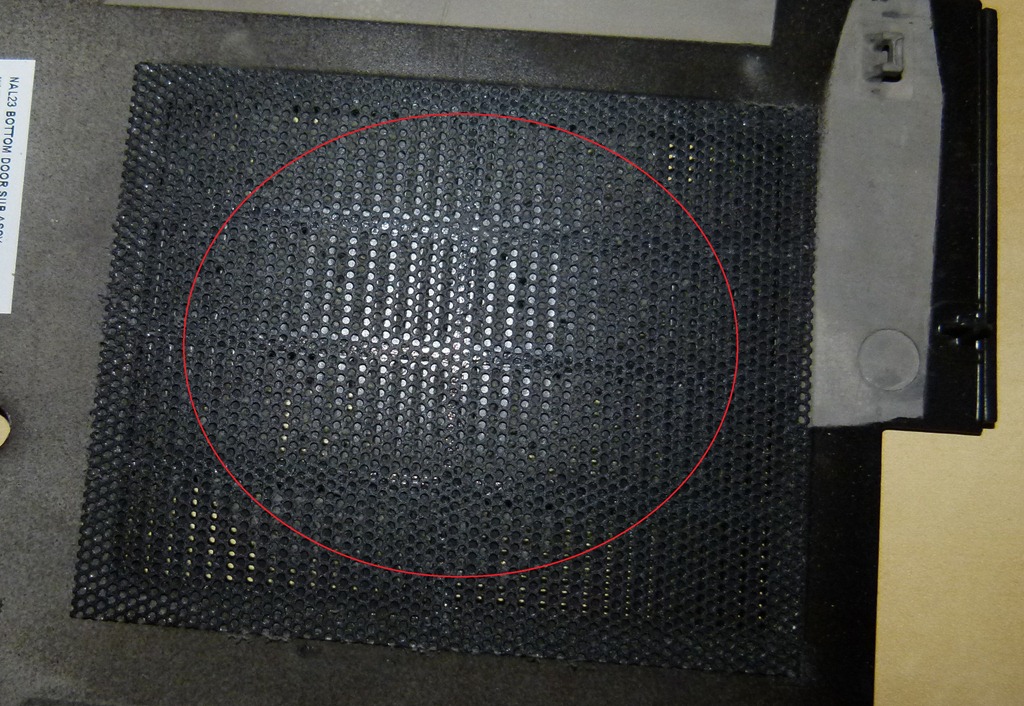
But it turns out that the bottom is cast magnesium (the pinnacle of light-weight moldable metals)), and it slides off neatly with the removal of 5 screws.
Thanks! I had no idea.
I want to add: I had some play in the display hinges on my M4500, but once I removed the two silver-colored plastic hinge covers (once the bottom is off, this takes two screws, each) I was able to apply another quarter-turn or so of torque to each of the 4 newly-exposed fasteners.
This tightened things up admirably, and the display hinges feel like a new machine despite it being 5 years old. There is zero play in the hinges at this time.
I also want to say that I can’t see what can be gained from removing the heatsink/fan assembly, in terms of cleaning: Once the bottom panel is off, the intake vents are all on a separate magnesium piece that is easily cleaned. The fan itself is mostly a centrifugal blower, and does not draw appreciable air from inside the machine. Further, there are no problematic heatsinks or fins that are largely internal.
If your M4500 (or E4610, which is about the same) is hot and full of dust, it should be able to be easily cleaned with a can of air (or a real air compressor) without any disassembly at all. Just instruct the computer to get the fan running (however one does that: Prime95, Dell ControlCenter, whatever), and studiously blow air in through the exposed vents. Rinse and repeat, as necessary depending on the clouds of dust that are produced.
(I blew mine out with an air compressor before I opened it, and found almost zero dust. And upon opening it up, I found that there was nothing left to clean. I hit the exposed underbelly with some canned air on general principal, to release whatever dust bison might be hidden, but I didn’t detect the liberation of any additional dust. Or of any new/old dust bison.)
Hi! We represent new platform of professional freelancers http://prozone.ae. Expert services for only 15$ will be the best assistance for your business