 There are occasions where you need a good load balancer but don’t have the budget. Microsoft offers Network Load Balancing services (NLB) as part of their Windows server operating systems, but although we’re looking for a cheap solution we try to avoid problems. This is where the Citrix NetScaler comes in. Gartner positioned the NetScaler ADC in the leaders quadrant of the Magic Quadrant for Application Desktop Controllers (for the 7th consecutive year in 2013), proving it to be good solution and a reliable partner. Using Direct Server Return (DSR) mode we can offer a “poor man’s solution”.
In this article I’ll explain why you might (not) want to implement Direct Server Return (DSR), how it works and of course how to configure it!
Costs
As said, sometimes we need a “cheap” solution because the budget isn’t sufficient. The costs of a Citrix NetScaler are determined by a number of factors:
- Platform – Ranges from VPX (virtual appliance) to MPX (hardware appliance to SDX (hardware appliance with advanced virtualization to consolidate up to 40 independently managed NetScalers)
- Edition – Three editions (Standard / Enterprise / Platinum) are available. Each edition offers a (sub)set of features
- Model – A variety of models exist to suit the most demanding IT and business needs. The model range offers an increasing throughput and other performance factors. Once you hit your thoughput limit packets are queued, not dropped. If the same NetScaler is used for other purposes –for instance Access Gateway – this could affect those services.
Depending on your needs there’s a NetScaler that fits your need. One of the criteria – looking at load balancing – is throughput. All platforms have different models which are limited on the throughput they can deliver. The more throughput you need the more expensive model you need. To give you a rough overview on the cost of a NetScaler VPX – the virtual appliance – this are the list prices of the Standard edition (which offers load balancing) .
| Model | HTTP throughput |
Standard edition |
| VPX-Express | 5 Mbps | $ 0 |
| VPX-10 | 10 Mbps | $ 2,000 |
| VPX-200 | 200 Mbps | $ 5,000 |
| VPX-1000 | 1 Gbps | $ 15,000 |
Source: Citrix Store – NetScaler VPX – January 10th 2014
NetScaler VPX Express
There is a Citrix NetScaler VPX Express available for Free! The Express edition is limited to 5 Mbps throughput but offers full NetScaler Standard functionality. It even includes five free Access Gateway Enterprise edition Concurrent licenses! The Express edition does not entitle you to file a tech support case, you need a retail NetScaler VPX license. Therefor it is not recommended for production use 😉
More information can be found in the NetScaler VPX Express FAQ and Citrix Blogs.
Throughput
As you can see throughput equals money, so with less throughput we can use a less expensive model (or platform). One way of lowering the throughput is by using Direct Server Return (DSR) mode.
In a normal scenario where a client communicates with a server via a load balancer the following steps are involved.
- The client requests a file from the load balancer
- The load balancer forwards the request to the server
- The server sends the file to the load balancer
- The load balancer sends the file to the client
In a Direct Server Return (DSR) mode the server doesn’t answer the load balancer but returns the file to the client directly, resulting in the following steps:
- The client requests a file from the load balancer
- The load balancer forwards the request to the server
- The server sends the file to the client
As a result the file returned by the server no longer travels through the NetScaler and less throughput is required. This – of course – only works if the returned data is the big data since all requests are made at the load balancer. In case you’re uploading large files from the client to a server the Direct Server Return (DSR) mode won’t help you here.
Applications
So when could Direct Server Return (DSR) mode be beneficial for you? If you need to load balancing client – server traffic where the response causes the majority of the throughput and you need a good load balancer that monitors the health of the servers, the Citrix NetScaler is a good option. If you don’t want to let all traffic flow back through the load balancer, due to throughput limitations DSR could be a solution.
Examples are:
- Trivial File Tranfer Protocol (TFP) – For instance for Citrix Provisioning Services (PVS)
- Microsoft App-V streaming via HTTP
- Web server offering large downloads (like bigfile.iso in the example above)
PS: Microsoft App V.4x streaming via RTSP and DSR mode does not seem to work according to Barry Schiffer. Apparently this has to do with the way Microsoft implemented the RTSP protocol.
Considerations
Before you start reading how you can configure your environment to use Direct Server Return (DSR) mode there are some things to consider. To achieve the aforementioned functionality a number of tricks are applied that might not work or break existing functionality. More information about features and limitations can be found in the Citrix eDocs.
Changes on load balancer AND server
implementing Direct Server Return (DSR) mode requires you not only change the load balancer but also the server. In other words, you required administrative access to the load balanced servers and need to make system changes. Not just the load balancer.
Packet Processing Flow
A Citrix NetScaler processes packets in a pre-defined order. When traffic flows through a NetScaler it evaluates its feature sets, logging matching policy actions.
As can be seen in the diagram a packet is evaluated when it travels from the client to the server and again when it travels back from the client to the server. When Direct Server Return (DSR) mode is used the packet never travels back through the NetScaler, as a result the a number of actions are never applied: Using Direct Server Return (DSR) mode the NetScaler can offer less functionality.
- CF + CMP + CKA
- Response Rewrite
- Apply Rewrite
- NS Body Transformer
- Caching – Read more about Integrated Caching here
Firewall and routing
Instead of changing the destination IP the destination MAC is changed (see paragraph “How it works” for details) the SNIP must reside in the same routing subnet as the VIP of the virtual server. If for example the VIP and SNIP are in 10.0.0.x and the server in 192.16.0.x then the packet is never routed . The SNIP sent outs a package from the 10.0.0.x subnet and therefore should not be routed, as a result no server picks up the packet (the NIC with the provided MAC listens on the 192.168.0.x subnet).
Incomplete SYN
From eDocs: Because the appliance does not proxy TCP connections (that is it does not send SYN-ACK to the client), it does not completely shut out SYN attacks. By using the SYN packet rate filter, you can control the rate of SYNs to the server. To control the rate of SYNs, set a threshold for the rate of SYNs. To get protection from SYN attacks, you must configure the appliance to proxy TCP connections. However, that requires the reverse traffic to flow through the appliance.
Because there’s an incomplete SYN Intrusion Detection / Protection Systems (IDS / IPS) could mark the traffic as malicious and therefore break it.
Monitors
Not all monitors can be used to monitor the health of services. This is is due to the fact that the NetScaler forwards packets using the server MAC address instead of the destination server IP. The following monitors are affected: Citrix-WI-Extended – FTP – LDAP – MySQL – NNTP – POP3 – Radius – SMTP – SNMP – USER (Custom Perl Script). More information (and a solution) can be read in CTX138969.
How it works
In short Direct Server Return (DSR) mode works by replacing the MAC addresses of the sender to the MAC address of the load balancer server (MAC based forwarding) and by providing the source IP of the client instead of the NetScaler (Use Source IP – USIP).
Let’s see how the the packets are changed in an example. Let’s assume the following fictitious IP and MAC addresses are used:
| IP | MAC | |
| Client | 10.0.0.1 | 00:01:aa:bb:cc:dd:01 |
| NetScaler – VIP | 10.0.0.10 | 00:01:aa:bb:cc:dd:0a |
| NetScaler – SNIP | 10.0.0.11 | 00:01:aa:bb:cc:dd:0b |
| Server | 10.0.0.100 | 00:01:aa:bb:cc:dd:64 |
If we look at the previous example, in normal mode four packets are sent (simplified):
| Step | Source IP |
Source MAC |
Destination IP |
Destination MAC |
| 1 | 10.0.0.1 | 00:01:aa:bb:cc:dd:01 | 10.0.0.10 | 00:01:aa:bb:cc:dd:0a |
| 2 | 10.0.0.11 | 00:01:aa:bb:cc:dd:0b | 10.0.0.100 | 00:01:aa:bb:cc:dd:64 |
| 3 | 10.0.0100 | 00:01:aa:bb:cc:dd:64 | 10.0.0.11 | 00:01:aa:bb:cc:dd:0b |
| 4 | 10.0.0.10 | 00:01:aa:bb:cc:dd:0a | 10.0.0.1 | 00:01:aa:bb:cc:dd:01 |
When using Direct Server Return (DSR) mode only three packets are sent (simplified):
| Step | Source IP |
Source MAC |
Destination IP |
Destination MAC |
| 1 | 10.0.0.1 | 00:01:aa:bb:cc:dd:01 | 10.0.0.10 | 00:01:aa:bb:cc:dd:0a |
| 2 | 10.0.0.1 | 00:01:aa:bb:cc:dd:01 | 10.0.0.10 | 00:01:aa:bb:cc:dd:64 |
| 3 | 10.0.010 | 00:01:aa:bb:cc:dd:64 | 10.0.0.1 | 00:01:aa:bb:cc:dd:01 |
As you can see the “magic happens” in the second step when the NetScaler requests the file at the server. Mac Based Forwarding: Instead of changing the destination IP to the IP of the server (10.0.0.100) the VIP is used (10.0.10), to ensure the packet is delivered at the correct server the MAC of the destination server is in the packet.
Use Source IP (USIP): Now the server needs to answer the client instead of the SNIP of the NetScaler. Instead of providing the SNIP as the source IP and MAC the IP and MAC of the client are provided in the packet.
Now the server receives a packet with an IP it doesn’t own (it receives a packet with IP 10.0.0.10 while it only owns 10.0.0.100). To prevent that the packet is dropped a loopback interface is created on the server with the IP of the VIP (10.0.0.10). To avoid problems with the ARP table the loopback interface is configured as a non-arping interface (for an example see below).
How to configure Direct Server Return (DSR) mode
Finally! Here’s the part where I describe the steps that are needed to get Direct Server Return (DSR) mode working ![]() . Configuring Direct Server Return (DSR) mode requires you to configure both the NetScaler and the server.
. Configuring Direct Server Return (DSR) mode requires you to configure both the NetScaler and the server.
NetScaler
Modes
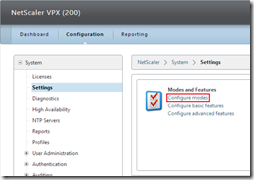
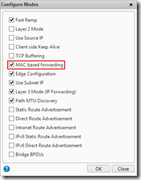
Since we use MAC based forwarding this mode needs to be enabled, by default it’s disabled. In the Configuration tab go to System> Settings and click on Configure modes. Select the MAC based forwarding mode and click OK.
Or via CLI
enable ns mode mbf
Basic features
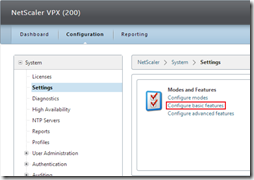
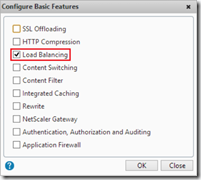
Of course the load balancing feature needs to be enabled, this is disabled by default. In the Configuration tab go to System> Settings and click on Configure modes. Select the MAC based forwarding mode and click OK.
Or via CLI
enable ns feature lb
Server
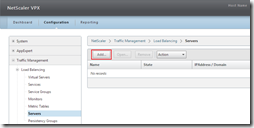
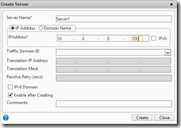
For each load balanced server a Server-object needs to be created. Nothing special here, just add a normal server. In the Configuration tab go to Traffic Management > Load Balancing > Servers and click on Add.
Or via CLI
add server Server1 10.0.0.100
Service
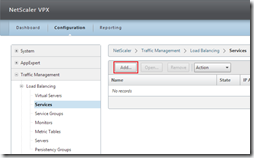
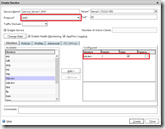
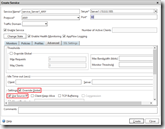
Each service offers one or more services (like HTTP, DNS, MySQL, etc.). A NetScaler load balances traffic across services, not across servers. We need to create a service with the protocol ANY, a basic monitor (as said earlier, not all monitors work with DSR– CTX138969) and Use Source IP (USIP) needs to be enabled. Of course the service needs to be bound to a server on a specific port, in the example port 80 (HTTP). In the Configuration tab go to Traffic Management > Load Balancing > Services and click on Add.
Or via CLI
add service service_Server1_ANY server1 ANY 80 -usip Yes
Virtual Server
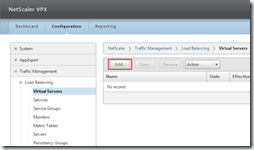
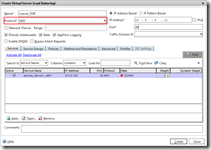
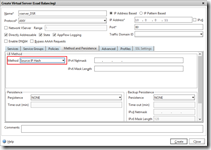
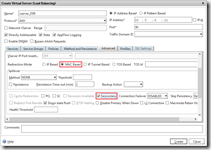
Last we need a virtual server that load balances traffic to one or more virtual service. What’s important is that protocol is ANY (just like the service), the load balancing method is Source IP Hash and the redirection mode is MAC based (aka MAC based forwarding). Since no return traffic passes the NetScaler is makes no sense to keep track of sessions, therefor it is recommended to make the virtual server Sessionless. In the Configuration tab go to Traffic Management > Load Balancing > Virtual Servers and click on Add.
Or vla CLI
add lb vserver vserver_DSR ANY 10.0.0.11 80 -lbmethod SOURCEIPHASH -m MAC -sessionless ENABLED
bind lb vserver vserver_DSR service_Server1_ANY
PS: For certain services (such as FTP) you need to enable connection failover: stateless
Server
Loopback interface
One each load balanced server a loopback interface is created with the IP of the virtual server VIP. This ensures that the server doesn’t drop the packet when it enters the IP stack.
Windows
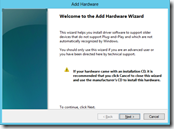
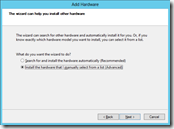
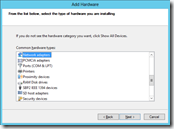
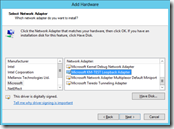
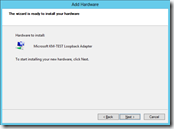
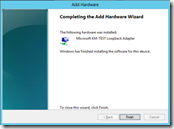
In Windows you can add a Loopback interface using the Add Hardware Wizard (hdwwiz.exe). In Windows Server 2012 the loopback interface is renamed to Microsoft KM-TEST Loopback Adapter.
Rename the new loopback network to “Loopback” in Control Panel > Network and Internet > Network Connections.
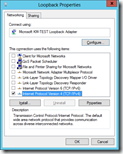
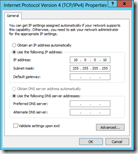
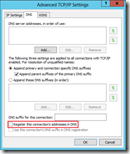
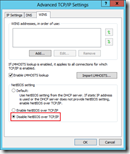
Open the properties of the Loopback adapter and disable all services except Internet Protocl Version 4 (TCP/IPv4) and specify the IP address of the virtual server VIP (10.0.0.100 in the example from above). The same subnet should be 255.255.255.255 (limitiing it to just this IP) , do not specify a gateway! Important as well is to disable DNS registration and NetBIOS over TCP/IP in the Advanced tab.
Linux
In Linux you can add a loopback interface via CLI
ifconfig dummy0 up
ifconfig dummy0:0 inet 10.0.0.10 netmask 255.255.255.255 up
Non-arping interface
To avoid problems with the ARP table the loopback interface is configured as a non-arping interface.
Windows
Open a command prompt and enable weak host receiving and sending on the loopback interface. Also enable weak host receiving on the production interface (bound to 10.0.0.100 in the example).
netsh int ipv4 set int "Loopback" weakhostreceive=enabled weakhostsend=enabled
netsh int ipv4 set int "Ethernet" weakhostreceive=enabled
It very well could be that your machine already cached some arp data. You could wait until the cache is invalidated or clear the cache by issuing the command
arp -d *
More information about strong and weak host models can be found at TechNet Magazine – The Cable Guy.
Linux
In Linux the loopback interface can be confiured as non-arping by issueing the following commands:
echo 1 > /proc/sys/net/ipv4/conf/dummy0/arp_ignore
echo 2 > /proc/sys/net/ipv4/conf/dummy0/arp_announce
More information about arp annound / arp ignore to disable ARP can be read at the WIKI of Linux Virtual Server. For more information see Configuring LINUX Servers in DSR Mode on Citrix eDocs
.



Fantastic article and very detailed, thank you!
Quick question please, why changing the load balancing method to SourceIPHash? Why not keep the default LeastConnection on?
That’s because the NetScaler is unaware of the number of connections for each server. This is because the return traffic is out of control for the NetScaler (due to DSR).
How do we configure Netscaler in l2 Extended Scenario
Thank you so much, Ingmar.
This is one of the most interesting article about DSR that I have ever read. I help me to resolve my problem.
Hi Ingmar.
I have a query about the solution.
If the IP address of server is 10.0.0.10, it is same with VIP on Netscaler. So, when requests from clients to IP 10.0.0.10, how can it differentiate between VIP and Loopback interface ? It seems we have a problem about conflicting IP address. Because they are the same subnet 10.0.0.0/8.
Thank you so much.
Kim Do.
Hi Kim,
The server that has the IP address 10.0.0.10 does not ARP out for the IP address in Ingmar’s configuration on the loopback interface. So only the Netscaler will send GARP (and response to ARP) for that IP. This means traffic from the client will hit the Netscaler.
The DSR configuration on the virtual server changes the VIP from “IP mode” to “MAC mode”. This means that as the Netscaler does Load Balancing to the backend it will only change the destination MAC address of the packet (to the servers MAC). The result is the server receives a packet with it’s MAC address and the loopback IP. Since the ServiceGroup is configured with USIP the server then uses it’s configured default gateway to get back to the client bypassing the Netscaler since the client’s IP is not a direct route.
Hope this helps with your questions above.
Chad
thanks, good post.
Wondering if you can clarify a couple of things. Should the IP of the Virtual Server IP on the Netscaler be 10.0.0.10 or 10.0.0.11 (screen shots show .11)? And for configuring the IP of the Loopback adapter you state “specify the IP address of the virtual server VIP (10.0.0.100 in the example from above)”. That’s incorrect too, right? Very confusing.
hi, does the weak host\strong host commands disable arp in 2012r2 or does it unchecking the metric and setting it to 254 do that?